Window and Door Insulation for Winter: How to Keep the Cold From Creeping Into Your Home?
In this post, I'll share the best tips on window and door insulation for winter.
By applying the quick wins I'm about to explain, you can enhance your home's temperature levels without spending hundreds of dollars on home repairs.
Keep reading to learn about several affordable cold-weather window and door treatment options that will prevent cold air infiltration.
What is the best way to block cold air from windows?
The first thing on the list is both inexpensive and easy. Insulating windows and doors with weatherseal tape will reflect on your utility bills fast.
Got it? Great, let’s dig in.
In fact, there are 5 simple steps you'll need to follow to insulate your door and windows.
I'll reveal all 5 in a minute.
Depending on the region and the year your home was built, the chances are high that your home's insulation rating is low.
Building codes did not require the inclusion of insulation until recent decades. Hence, the buildings frequently omitted the installation of insulating materials during construction.
With temperatures dropping into the single digits, your home is left shivering in a threadbare jacket instead of luxuriating in a cozy comforter.
Unfortunately, adding insulation after initial construction is not always feasible and can be expensive, even if possible.
This especially is true if you rent your home since you are unlikely to be willing or able to invest in adding insulation or upgrading to doublepane windows.
The key to creating a comfortable interior is reinforcing the walls. Ideally, these walls would be insulated to provide weather sealing barrier between the outside cold and the inside living space.
In reality, these walls too often offer flimsy protection from the elements. Over time, as buildings settle and weather exposure takes its toll, joints and other connections begin to separate a little, allowing air to leak through.
That is why air sealing your apartment or house windows is so important.
Now, you must be asking how to keep cold air from coming through windows?
Fortunately, there are several steps you can take to help defend your home against the invasion of cold air coming through the windows.
In This Guide You'll Learn:
Identify Air Leaks and Drafts
Gaps that let outside air into your home or conditioned air out of your home make your air conditioner and heater work harder, consuming more energy and costing you money.
If your heater is working overtime to warm-up the whole neighborhood, it’s doing you no good at all. Sealing gaps in your home’s exterior envelope — or between conditioned and unconditioned parts of your home — is an easy and effective way to cut energy costs and keep your home more comfortable.
First, identify all air leaks and drafts using a stick of incense or a candle.
It is necessary to do this before you start insulating windows for winter.
Slowly travel along all walls, noting where the smoke or flame bends or shifts direction, indicating a leak.
High-tech methods include pinpoint microphones that allow you to hear drafts and infrared thermometers that identify cold spots that could be air gaps. A professional energy auditor may have an infrared camera to take a picture of your home’s heat loss and gain.
Likely locations of air leaks include wall outlets, window sash, window frames, and ceiling light fixtures. Once you find all leaks, use the appropriate method for sealing:
- Large holes and gaps around 1/4" or larger can be filled with expanding foam spray and a putty knife;
- Weatherstripping belongs around doors and movable window parts;
- Improve your window using rubber weather sealing draft snakes;
- Recaulk your windows. Silicone caulking gun or clay rope strips should be used to fill any remaining gaps;
- Make draft snakes or draft stoppers, place them at the bottom of doors to keep the cold from seeping in. Fill a pants leg, shirt sleeve, or pantyhose leg with fabric scraps, pebbles, sand, or rice.
Sealant: A Draft's Worst Enemy
Just because your doors and windows are closed doesn't mean winter is at bay. Drafts that sneak through cracks and holes in a building's envelope — the barrier between the indoor and outdoor environment — can waste 5-30 percent of household heating, according to the U.S. Department of Energy (DOE).
The key to managing both your thermostat and energy bills without compromising comfort is a tight building envelope. Luckily, the setup is easy.
How to Seal Leaky Windows in Winter?
Sealants such as caulking and weatherstripping provide low-cost ways of guarding your home against drafts. Plus, the energy savings typically offset the cost of improvements within one year, while the improvements themselves last several years.
Choose Your Weapon
Caulk is useful where gaps are small (narrow cracks and gaps up to a few millimeters) and where a more finished look is desired. Spray foam will fill larger gaps and expand to fill spaces, as well as provide some insulation.
There are a lot of different types of caulk and caulk-like products out there. Products are labeled to indicate where they’re best applied, so look closely at the packaging. Criteria to consider include: interior vs. exterior; wet vs. dry; and the material it’s being applied to.
Find it, Seal it
First things first: find out where the draft is coming from. One way to do this is to shine a light through suspected leaks while a partner stands on the other side.
Most homeowners are aware of the drafts by their windows and doors. Still, the most significant air leaks are often in the attic, basement, and chimney.
The location and nature of drafts will determine what kind of sealant to use. Caulking is used to seal air leaks between two stationary surfaces, such as a crack in a wall, and works best in gaps less than 1-quarter-inch wide. It comes in several materials, including silicone, polyurethane, latex, and rubber, of varying durability. Cost and ease of application vary, too.
Weatherstripping is used to seal joints between two moveable surfaces, such as doors and windows. Like caulking, weatherstripping products vary in materials and can be made of felt, vinyl, magnetic, and foam.
If you're thinking of installing your own sealant this season, consult the ENERGY STAR's Do-It-Yourself Guide to sealing air leaks.
Sealant Application
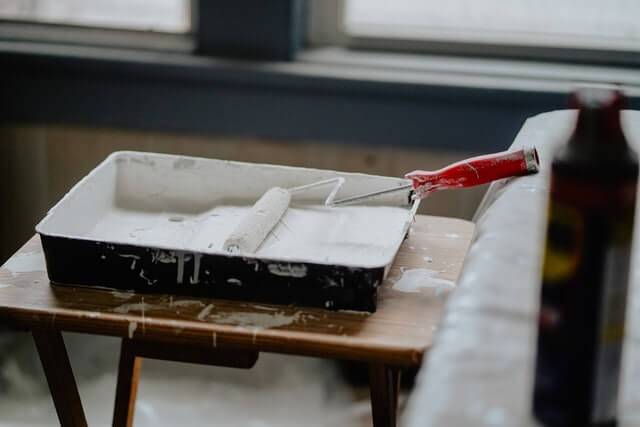
First off: Caulk is messy stuff; and spray foam is far messier.
So these are definitely projects you’ll want to wear grungy old clothing for; a bit of spray foam will never come off fabric it’s bonded to. Since spray foam takes two or three days to come off skin and up to two weeks for finger nails, you may want to wear latex gloves.
Spray foam has a magical way of getting everywhere, so you should put newspaper or a drop cloth down if you’re working over a nice rug or hardwood floor.
Though some caulk is available in squeeze tubes that work a bit like toothpaste, most come in rigid tubes that are placed in a spring-loaded caulk gun that pushes caulk out a nozzle from the back.
When opening a new tube of caulk, you have to cut the tip off the nozzle. A smaller hole will create a slower and more manageable flow. You can always make it bigger later if it comes out too slow.
Getting the hang of applying caulk or spray foam in a tidy manner can take some practice. You may wish to start out in less conspicuous areas. Have plenty of paper towels or rags on hand.
For caulk, you can smooth down lumps and messy spots with a paper towel, rag, or your finger. Spray foam is more difficult to control as it expands after application, but it’s easily trimmed down with a sharp knife or razor blade after it has hardened.
Insulating Doors
Your doors are probably the easiest access winter has to your home. Although you may not be able to get the kids to close the door after a cold romp in the snow (you might try a bomber-hinged door), you should be able to keep old man winter from sneaking in around the cracks.
How to Keep Cold Air from Coming through Doors?
Of course, the easiest way to stop cold air from coming in under the door is a towel, or other contrivance pushed up against the base of the door. But this is only a temporary and half-hearted measure...
There are several ways to restrict this airflow with a sweep and many types of door sweeps available. Most are easy to install and involve a metal bar with a strip of rubber-like vinyl that rides lightly on the floor as the door swings, but forms a seal against a raised threshold (see illustration below).
Installation involves purchasing a sweep that either fits or is wider than the door, cutting it to length if necessary, pre-drilling holes for screws, and screwing in place.
Another way to keep air from seeping in under doors is by adding a door bottom (see image at right). To do this, you may need to shorten the door (don't try this with a steel door). To trim a wooden door, take the door off its hinges and lay it on its side. Mark the amount you wish to remove with a straight edge. Cut with a skill saw or very carefully with a table saw. You can screw in the bottom after pre-drilling holes, and the base or threshold is installed the same way.
There is nothing to prevent you from installing both a sweep and a bottom.
To reduce airflow around the other parts of the door, use weather stripping. This is a foam substance that has sticky tape on one side. It is usually purchased in rolls.
Simply measure the length of the area to be treated, cut the strip, peel the backing and push in place on the door's jamb. V-strips (narrow metallic strips shaped like a "V") can also be installed on the jamb (the piece of wood that sticks out slightly from the frame and stops the door when you close it), or sometimes on the frame itself.
With these measures taken, you will be well-started in preparing your home for winter. Now let's turn to the windows.
How to Insulate Windows DIY Way
After sealing all holes, gaps, and cracks, it is time to insulate your windows. Around half of all homes in the United States have only single-pane windows.
| Method | Cost per window | R-value added | View through? | Reusable? | Best for |
|---|---|---|---|---|---|
| Bubble wrap | $0–$2 | ~R-1 | No (frosted) | Yes | Utility/basement windows |
| Plastic shrink film kit | $5–$12 | R-1 to R-2 | Yes (clear) | No | Living room windows, renters |
| DIY secondary glazing | $18–$40 | R-2 to R-3 | Yes (clear) | Yes | Single-pane windows, permanent fix |
| Thermal curtains | $20–$60 | R-1 to R-2 | When open | Yes | Bedrooms, overnight insulation |
| Professional secondary glazing | $150–$400 | R-3 to R-4 | Yes | Yes | Living rooms, long-term investment |
| Window replacement | $300–$1,000 | R-3 to R-5 | Yes | N/A | When frames are also failing |
Windows made using a single pane of glass allow significant heat loss and account for up to 25% of your heating utility costs.
You would replace all windows with modern glazed, double-paned windows featuring energy-efficient treatments in an ideal world.
But often, window replacement isn't feasible.
How to Insulate Apartment Windows?
Instead of window repairs, try one of these affordable yet effective options for DIY window insulation:
- Create an insulating air pocket barrier with bubble wrap insulation. Use whatever size of bubble wrap you have handy, though opt for the larger, quarter-sized bubbles if you have the choice. Cut pieces of the wrap to fit your window panes. Spray a mist of water on the indoor window glass and then press the wrap in place. This method obscures visibility and isn't recommended for use on a window you wish to see clearly through.
- Film insulation: Use thin plastic sheets to form a protective barrier between the cold glass and your interior space. Secure the sheets of insulating window films with strong tape to the outside of the window's frame. Keep in mind that removal will require extra care to avoid the paint from peeling off with the tape.
- Thermal curtains: Make cardboard shutters that can be easily removed during the day to allow in light and heat from the sun. Cut several pieces of corrugated cardboard to fit snugly in your window frame. Secure with duct tape. Attach foam weatherstripping around the entire edge and then put your window coverings in place at least an inch away from the glass. For added insulation, take an emergency space blanket (or aluminum foil) and glue it to the inwards facing side. The material will reflect some infrared heat into the room.
All this is applicable to glass doors also. And don't forget to check the bathroom windows as well!
How to Isolate Windows when Landlord says No
DIY window insulation projects and other home projects are ideal for homeowners with a tight budget.
But what if you live in a rented apartment and your landlord says NO to window treatments and home remodeling?
In that case, there is not much you can do. Except this:
You can further insulate your home with the strategic use of blankets and heavy curtains.
Air sealing the door with sealing strips or doublesided tape might also help. Same applies for drafty apartment windows.
You can even try to use some of the window insulation film products that do not leave marks after removal.
Snuggling up in a thick comforter keeps you warm and, similarly, wrapping your walls, windows, doors, and even ceilings with blankets will help keep your space warm.
Hang a quilt over doorways to minimize drafts, and drape heavy curtains over the entire length and beyond. Keep fabric away from heat sources or flames.
Also, periodically check behind any hangings (thermal curtains) to monitor for condensation on windows or moisture, which leads to mildew and mold.
Bonus Tips: Get Ready for Winter Outside
It makes sense first to get ready for a cold winter inside, as this is where you are trying to keep the heat in and the cold out. But it also makes sense to prepare for the weather outside the house.
Preparation begins with a caulk, a caulking gun, and a trip around the perimeter of your house, looking for cracks where the wind can get in. Find old caulk that has dried and withered, remove it with a putty knife and replace it with new, high-quality caulk.
When you get to the hoses surrounding the house, be sure to unhook them from the faucet, drain the water, and hang them in the garage to prevent cracking and weathering.
The faucet might also need some attention. Water in the tap can freeze and burst piping in the wall.
The short-term solution is to put on an insulated cover for the season (may be purchased at a local hardware store).
The long-term solution is to place a valve inside the house that shuts off water to the outside valves.
Shut these off at the beginning of the winter season. Then open the outside faucet to allow any water in the pipe to drip out. There are also outside faucets built to resist freezing. The faucet valve shuts off inside the house and allows any water left in the faucet to drip out.
Don't forget your outdoor plants. You can bring in and winter many hanging plants. Some bulbs such as calla lilies and gladiolus must be dug up and stored in a warmer (though not real warm) place.
Do not dig up plants that require cold weather to grow again in spring, such as grape hyacinth, daffodils, and tulips. Young trees should be wrapped and fenced to prevent weather damage as well as rabbit and rodent foraging.
For perennial plants, you can cover their beds with a loose mulch. Plants such as roses can be covered with a burlap material to prevent damage. You may put on a thin layer of winter fertilizer for lawns that will help with root development in the spring.
Don't forget your outdoor machines, lawnmowers, motorcycles, and four-wheelers could all stand some attention. If you are not inclined to drain the gas from these machines, try using a special winter gas additive. This is also a good time to change the oil.
Remove the batteries from motorcycles that will not be started for several months and store them in a warmer place. In rural areas, mice can be a problem, nesting under seats and eating the wiring.
To prevent your pool from being cracked by frozen water, it is best to drain the pool and make sure the plumbing leading to it is winterized. In addition, cover the pool to prevent dirt build-up, and make sure that the area is secure from children or others who might be hurt by walking off the side into a waterless pool.
The fall season is also a good time to add a coat of sealer to decks, porches, railings, etc.
A combination of the weatherization techniques listed above can significantly reduce energy bill and the shivers in your home this winter.
Not sure where to start with insulation? The cheapest ways to keep heat in guide ranks 9 insulation methods by payback period — from free (bubble wrap windows) to long-term (cavity wall) — so you know exactly which to do first.
Take it further: passive solar heating. Once your windows are insulated, consider how south-facing glass can actively heat your home — passive solar heating uses direct gain windows, Trombe walls and thermal mass to provide 20–40% of a home's heating demand with no moving parts and no running costs.
Insulation done? Reduce your energy bills further. Once windows and doors are sealed, consider generating your own electricity — plug-in solar panels require no installation and work from any south-facing window. For storing heat passively, a DIY water tank thermal store is the cheapest way to carry daytime solar heat through to the evening. Full comparison of storage methods: solar thermal storage guide →
Frequently Asked Questions
What is the cheapest way to insulate windows in winter?
Bubble wrap pressed onto the wet glass with the bubbly side against the pane is the cheapest effective method — free if you recycle packaging wrap. It reduces heat loss by up to 50% on single-pane windows and requires no tools. Rope caulk pressed into frame gaps seals draughts for under $5. These two methods combined represent the lowest-cost window insulation approach available. Full guide: bubble wrap window insulation →
What is the best window insulation for renters?
Bubble wrap (water-adhered, no tape) and rope caulk (pressed into gaps, peels off cleanly) are both renter-friendly — they leave no residue and no damage. DIY secondary glazing with magnetic acrylic panels is removable and non-damaging. Plastic shrink film kits are generally renter-safe but occasional frame marking can occur. See the secondary glazing guide → for the best renter-permanent option.
Does window insulation actually save money?
Yes — measurably so, especially on single-pane windows. Bubble wrap insulation on a single-pane window reduces heat loss by up to 50%, which at current UK energy prices can save £10–£30 per window per winter. Draught sealing saves more — up to £200–£300 for a whole house. The payback on DIY window insulation is typically days to weeks, making it the fastest-payback home energy investment available.
Related Guides
- Bubble Wrap Window Insulation: Cut Heat Loss by 50%
- DIY Acrylic Secondary Glazing: Cost Per Window
- Draught Proofing Windows and Doors: Complete DIY Guide
- How to Cover Old Window Sills with PVC
- Best Roof Insulation: Types and R-Values
- Cheapest Ways to Keep Heat In: 9 Methods Ranked
- How to Reduce Your Electricity Bill: 12 Methods Ranked